Using the TI LaunchPad (MSP-EXP430G2) as an AVR ISP programmer
I recently found this article on Hack A Day that illustrates how to set up a TI LaunchPad as an AVR programmer and, boy, does it work well! These LaunchPad's are quickly becoming by go-to choice for quick prototyping of ideas (as long as they aren't too complicated.)
Tutorial Project: External System Gauge (Part 1)
 I think a tutorial is best served by working through a functional example. For our first one, we are going to use the Teensy to receive real-time system parameters (CPU utilization/temperature, memory usage) via a USB connection and display them using an analog meter (specifically, the one shown to the left.)
Interfacing a graphic LCD

Pretty Jumper Cables
A few years ago, I purchased a surplus set-top box that was basically just a generic 100Mhz x486 compatible computer that I was going to use as a component in my stereo system to play MP3s, complete with remote and LCD display. I wrote the server-side database (Apache, SQL) and had most of the client-side software written (all in Perl, IIRC.) The last piece of the puzzle was getting the LCD & remote (plus a rotary encoder for good measure) working. I had already found the perfect LCD (from All Electronics, of course); it was the (almost) perfect physical dimensions for my box, and I had already designed some variable-width fonts and planned the functionality of the interface - I just, you know, didn't know how to make it all work. Well, I decided to tackle this last part of functionality.
The secret lives of magstripe cards
 I love All Electronics, the Van Nuys, CA retailer that buys surplus electronics inventories and offers them to the public at discount prices. One of the items I acquired through them was an assembly from a credit card verification device - it included a circuit board with various ICs (including a DTMF encoder/decoder that I plan to mess with at some point) and a 2-track magnetic stripe reader manufactured by MagTek, Inc. From the datasheet, the interface seemed relatively straight forward: aside from +5v and ground, there were a strobe (clock) and data line for each track, and a common 'card present' line.
First projects
This post is to get up to speed on the digital projects I've been experimenting with. Over the years, I've collected various components in the hopes that one day I would bring them to life respectively scanning, displaying, or blinking on my desk. My first project, however, was just to get my feet wet with the unit. It read the input from one of the ADC's (analog to digital converters) and display it's estimated value onto 3 LEDs (light emitting diodes.) I mostly used code examples from the Teensy website.
Welcome
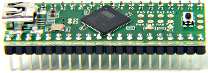
Hello, and welcome. The purpose of this blog is to document my projects and progress utilizing my newly acquired Teensy++ USB development board. Ever since I've been interested in computers and programming, I have always wanted to explore outside the realm of mere software and try and interface to devices in the outside world. Basically, I've had a few projects that have been bouncing around in my head for the past 15 years or so that I would like to see become a reality. What you will read ahead is my own personal experiments toward that goal. I am no expert, and I have never had a clear grasp of electrical theory, so I am sure my writing will be punctuated with tales of smoking components and misapplied theories.
I purchased the Teensy++ a few weeks ago and I have been very happy with it so far. One of the roadblocks to doing any type of work like this has been the development cycle - I code in small blocks and test/debug frequently (a consequence of my self-taught programming, no doubt) and it seemed to inconvenient to switch to separate program each time I needed to reprogram the microcontroller. I know there are in-circuit programmers and what-not, but given I don't have much experience in electronics to begin with, this seemed like too much of a hurdle. The Teensy solves these problems by combining an ARM MCU with a USB port right onto a DIP package that can plug easily into a breadboard. It comes with a small driver that runs in the background and responds to a button on the package that automatically updates its firmware and resets the MCU, running the new code. That means that after you've compiled your latest version, all it takes is a button-push to have it running the new code. It sounded simple in theory and I can attest that it holds up in practice. Once I had it ordered, my brother graciously gave me a few needed items (a large breadboard, some LEDs (that I have since toasted - oops), a handful of resistors (that I should have used with the LEDs) and other miscellaneous items that have proved to be very useful) and I have been tinkering every chance I get.
I plan to put up pictures, diagrams and code examples every chance I get. If you've ever wanted to get your feet wet with digital interfacing, I hope you stick around and get inspired by the face that if someone with my limited expertise in electronics can do it, you can too!